Curriculum
Programming 101
A great way to learn how to program is to create code that will control the microprocessing devices that you connect to various LEDs, sensors, and other external devices to interact with your physical environment. Let’s walk through the process of making an LED blink by controlling it via code.
What do I need to write code?
- a computer, either Windows or Macintosh, on which you can install software
- an IDE, or Integrated Development Environment, that will work well with the device you want to program. For our purposes we will use the Arduino software available for free here.
- a device you want to control. For our purposes we will use an Adafruit Trinket microprocessor as it has a programmable LED built-in.
- a micro-USB cord to connect your computer to your device.
Getting Started with the Arduino software
Arduino is a popular microprocessor that has wide acceptance in the Maker community as a great device for prototyping. The first thing you need to do is to configure your computer hardware (your “environment”) to work with the software (your “IDE”) that will connect to your device (the Trinket microprocessor).
Step 1: Installation
Download the Arduino software to your computer and follow the installation steps listed here. You will need to ensure that you have set up the Arduino software to interface with the Trinket, which means you need to also install a few separate libraries. When everything is installed, open the software on your computer by double-clicking on the software’s icon.
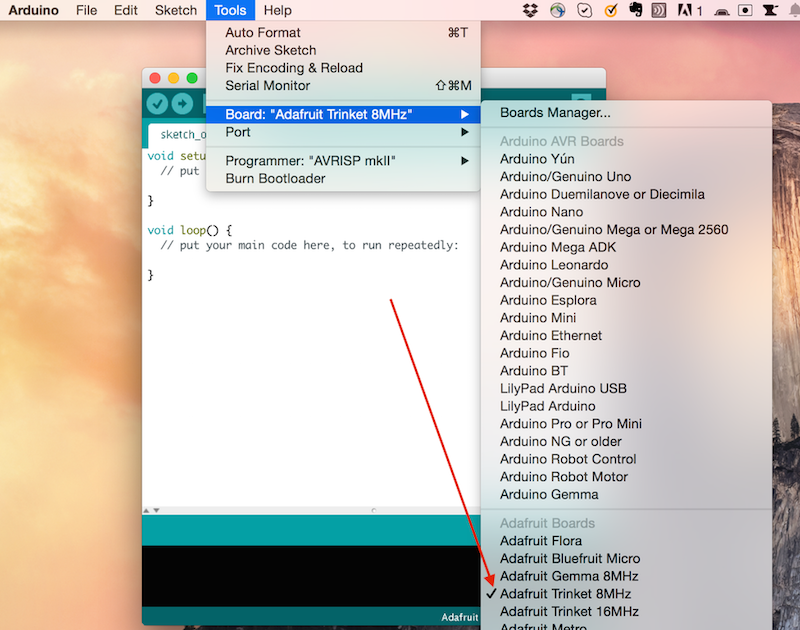
When your IDE is properly configured to support the Trinket board, you should be able to select it in the Tools dropdown menu:
Step 2: Connect the Trinket
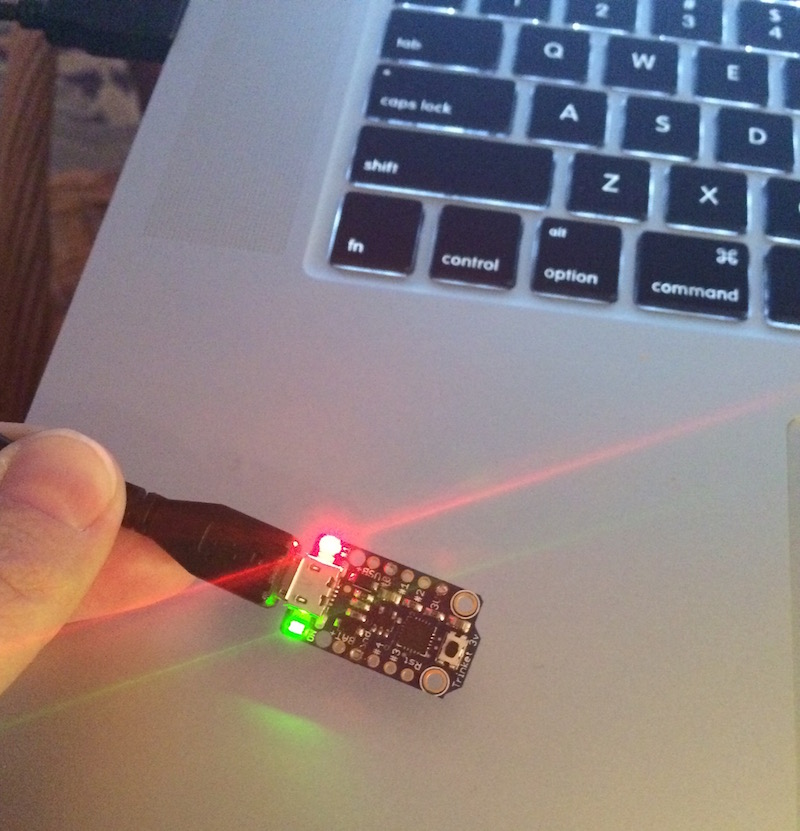
Plug the small end of the USB cord into the Trinket microprocessor and the large USB plug into your computer. The Trinket should light up, as it is now drawing power via the USB cord.
Step 3: Take a look at some sample code
In your Arduino IDE, navigate in the top toolbar from File > Examples > 01.Basics > Blink and open this sample code. You’ll see a few lines of code. Copy this code by selecting File > Save As. Give your new file the name myBlink and save it to the Arduino folder. The IDE automatically opens this new file so you can edit it. The file can also be accessed by choosing File > Sketchbook > myBlink. Files in Arduino are called ‘sketches’ which is why they’re saved in a ‘Sketchbook’.
Note: the Arduino IDE comes with several files of sample code in File > Examples. It’s a good idea to explore these files to get to learn this software.
Step 4: Make a comment
Open the myBlink file that you just created. Let’s walk through the code here.
The top part contains a chunk of gray text with some explanation of what is going on in the code. It is surrounded by the /* and */ symbols. This is called a code comment. It is skipped over by a computer when it’s time to read the code. Programmers use comments to make notes for themselves and for others to understand what’s going on in the code without affecting the performance of the code itself.
Exercise: Edit the Comments
Edit the top code comment block to make it personal to you. You could replace the parts between /* and */ with something like this:
/* This code was created by Jane Smith on 10/01/2015 and causes an LED light to blink on the Trinket*/ Make sure to save the file.
Step 5: Edit some code
Arduino software is written in the C or C++ language. C is a good language to learn when you’re starting out. Let’s look at the two blocks of code that will tell the Trinket to flash an LED light. The first is the ‘setup()’ function.
Note: a Function is a block of code, often surrounded by curly brackets like these:
{}. A function in a computer program tells the computer to do something.
In the setup() function, the function is written to not send any data back to the computer, so it returns ‘void’: void setup(). Functions can execute code that sends back a chunk of data, in which case its first line might look like int setup() if it were intended to return an integer. The setup() function gets the Arduino ready to start working.
Exercise: Edit the setup() function
We need to make this code work on the Trinket, and the Trinket does not include an output LED pin at position 13, unlike some other devices like Arduinos or Raspberry Pis. Looking at your Trinket device, you see that it includes a tiny red LED labelled ‘1’. This is the light we’re going to control with our code. Edit the setup() function to change the initialization of pin 13 to pin 1:
	void setup() {
		// initialize digital pin 1 as an output
		pinMode(1, OUTPUT);
	}
What has changed? First you edited the comment which follows the // marker. Comments occupying only one line can be commented out like this.
Second, you changed the pin to control to 1, marking it as an OUTPUT that will flash.
The
pinModefunction is a function available in the Arduino language library. Pinmode configures a given pin on your device as either an output or an input. In our case, we pass two parameters to this function, the pin, and its mode. We set pin 1 to have the mode OUTPUT. LEDs are usually outputs, whereas a button would probably be an input.
Step 6: Edit the loop() function
Now that you have configured pin 1 to be an output in the setup() function, you need to do something with that pin to make it behave the way you want it to. In the loop() function below the setup() function, a few lines of code will be rerun in a loop, indefinitely. Edit the loop function so that the proper pin on the Trinket will blink.
Exercise: Edit the loop() function
Let’s make the LED at pin 1 blink on and off every second, or ever thousand milliseconds.
digitalWrite(1, HIGH);   // turn the LED on (HIGH is the voltage level)
delay(1000);              // wait for a second
digitalWrite(1, LOW);    // turn the LED off by making the voltage LOW
delay(1000);              // wait for a second
Using the digitalWrite() and delay() functions in sequence, you can set pin 1 to have a HIGH voltage level, wait, and then set it to have a LOW voltage, and wait again. This code will run in an infinite loop.
Step 6: Compile and Flash your code to the Trinket
Now that you have your code complete, you’re ready to upload it to the Trinket, a process also known as ‘flashing’ the code.
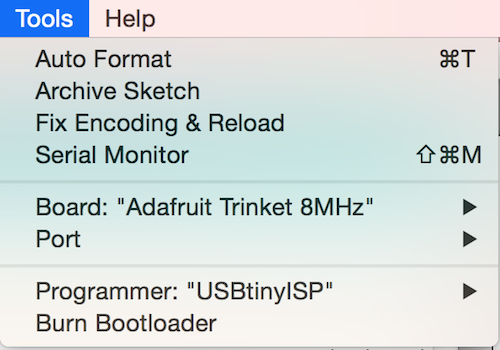
First, make sure that the board is set to Trinket, and the Programmer is set to USBtinyISP:
Press the button at the end of the Trinket for a few seconds, and release. The red LED will fade, then start to flash quickly. This means that it’s listening for code to upload. When the light flashes, click the ‘upload’ icon at the top of the myBlink code screen. Watch the console at the bottom to make sure everything goes well.
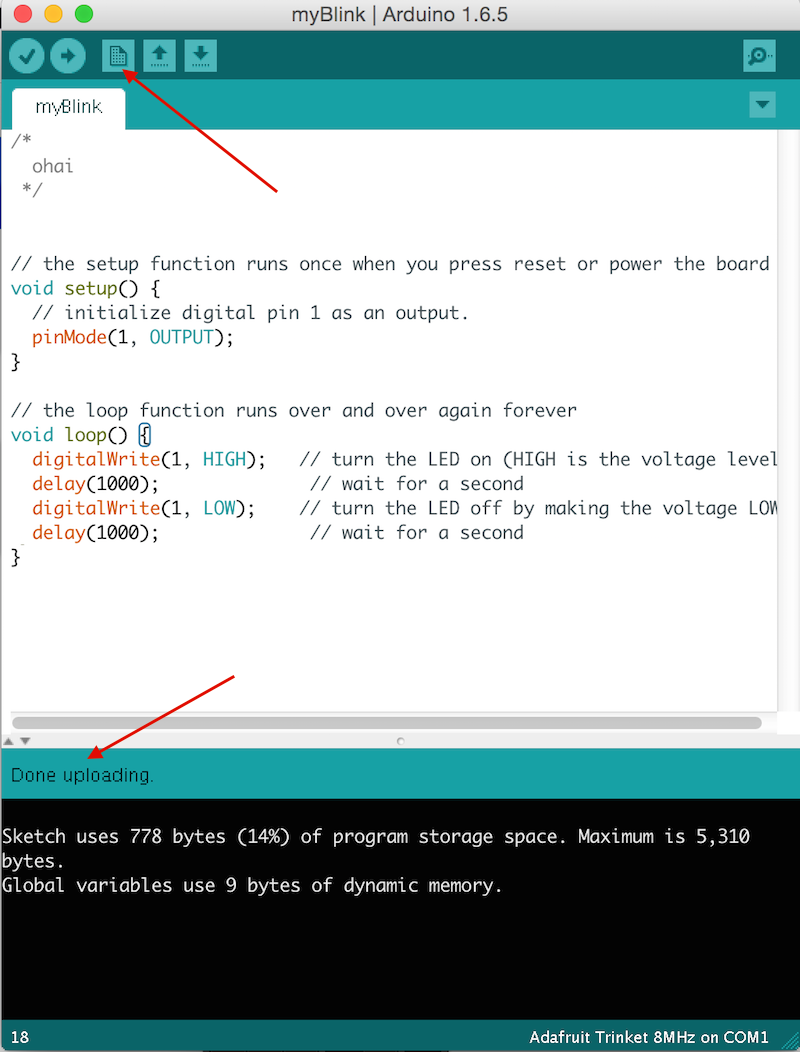
If everything works, the LED will start to blink on and off each second, repeatedly.
Note: sometimes pressing the button on the Trinket doesn’t cause the device to go into listening mode. Try unplugging the Trinket and replugging it into your computer’s USB port.
For a challenge, edit the loop() function so make the LED flash at different intervals. Reflash the code to the Trinket and see what happens!
What we learned
We learned how to configure an IDE for the Trinket and make an LED flash on the device in a loop. Next, we’ll learn more programming concepts and how to make a Trinket do other cool things.